Clock Prompt Setup
Clock prompts commonly collect department or tip data from employees when they punch in and out. There are two kinds of clock prompts:
- Labor prompts classify the hours. They collect data like a job codes, department codes, or locations.
- Numeric prompts collect numerical values that need to be summed and associated with the employees' hours. This includes data like tips, mileage or piece count.
This article is intended for Swipeclock providers who are setting up clock prompts for their client in TimeWorksPlus or WorkforceHub Time+. If you are setting up clock prompts in TimeWorks, see Clock Prompts - TW.
Also, hosted or stand-alone voice clock have different steps for clock prompt configuration. Please reference the following articles:
For videos related to clock prompt configuration, please see VIDEO: Clock Prompts.
Clock Prompt Topics
Adding Prompts
Clock prompts can be created by Swipeclock partners with an accountant-level login. However, clients can be given the ability to manage prompts through the "Client can manage clock prompts" permission. See Clock Prompt Edit Permissions for your Client.
There are multiple ways to get to the clock prompt setup page in TimeWorksPlus, but the easiest way is by selecting the client and clicking Settings Menu ⇒ Client Configuration and choosing the Clock Prompts tab.
Creating a new clock prompt is done by clicking the Add Prompt button.
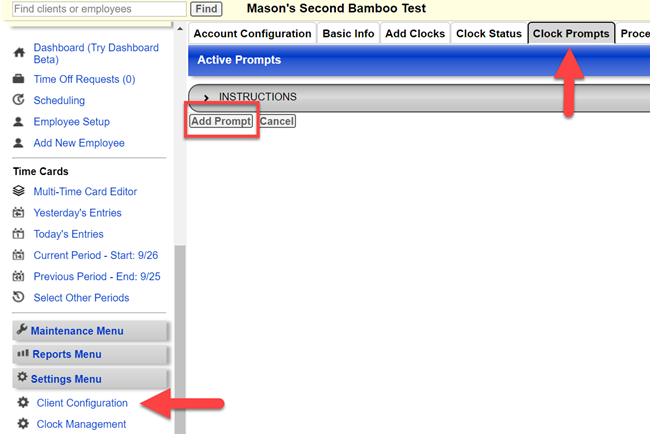
Adding a new clock prompt is done in Client Configuration
Editing an existing prompt is done by clicking the hyperlinked text that describes the type of prompt.

Modifying an existing prompt is done by clicking the prompt type
If you are new to clock prompts, please read the following sections explaining the types of clock prompts.
Labor vs Numeric
There are two types of prompts:
- Labor prompts are for tracking hours within labor segments. Departments, job codes, and locations are all examples of labor prompts.
- Numeric prompts are for tracking totaled amounts, like tips, mileage, or piecework.
TIP: When deciding what type of prompt you need, remember this: If it needs to be counted and totaled, use a numeric prompt. If it's related to labor allocation, use a labor prompt.
Lettered vs Web Only
Two sub-types of both labor and numeric prompts are "lettered" and "web only". Knowing which one to use depends on the type of clock and the features needed.
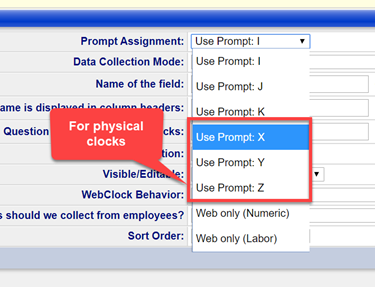
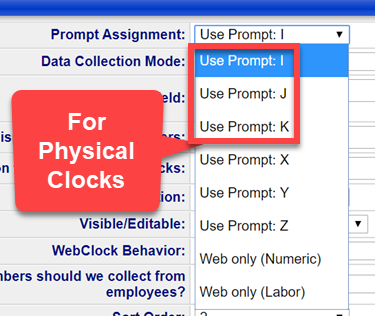
- Lettered prompts (I, J, K, X, Y, Z) are the only prompts that work with basic physical clocks, which are any clocks that do not have Intelligent Clock functionality.
- I, J and K are reserved to collect numeric data on physical clocks.
- X, Y and Z are reserved to collect labor data on physical clocks.
- Web only prompts are much more versatile than lettered prompts. They have a higher character limit and include filtered prompt functionality. They can only be used on WebClock, mobile and Intelligent hardware clocks.
*NOTE: Lettered prompts can be used on WebClock, mobile and Intelligent hardware clocks, but there are some limitations with the lettered prompts. Except for location stamps, it is recommended to use Web Only prompts for clients with just WebClock, mobile and/or Intelligent hardware clocks.
Add a Labor Prompt
Follow these steps if you are creating a prompt for classifying hours with labor allocation. For location stamp instructions, see the section titled Add a Location Stamp. If you need to add a numeric prompt for tips or mileage, see the following section titled Add a Numeric Prompt.
To create a labor prompt:
- Click Settings Menu ⇒ Client Configuration and choose the Clock Prompts tab.
- Click Add Prompt. The following steps detail each field on the setup window.
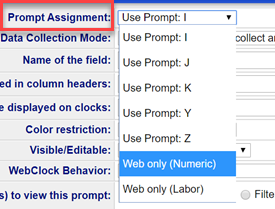
- Prompt Assignment depends on what kind of clock your client is using:
- For basic physical clocks, like the Z33 or GT-400, choose either X, Y, or Z.
- For WebClock, mobile or Intelligent hardware clocks (Touch and Vision), choose Web only (Labor).
NOTE: Technically, you can use X, Y or Z on these clocks, but because lettered prompts lack additional features, it is suggested you use "Web only" whenever possible.
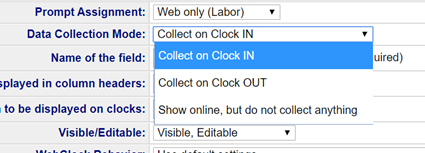
- Data Collection defines when the employee will see the prompt. In most cases, labor prompts are collected when clocking in, so select Collect on Clock IN.
- Name of the Field identifies the prompt in the system. Field names must:
- Be no more than 20 characters in length.
- Start with a letter.
- Not contain any special characters or spaces.
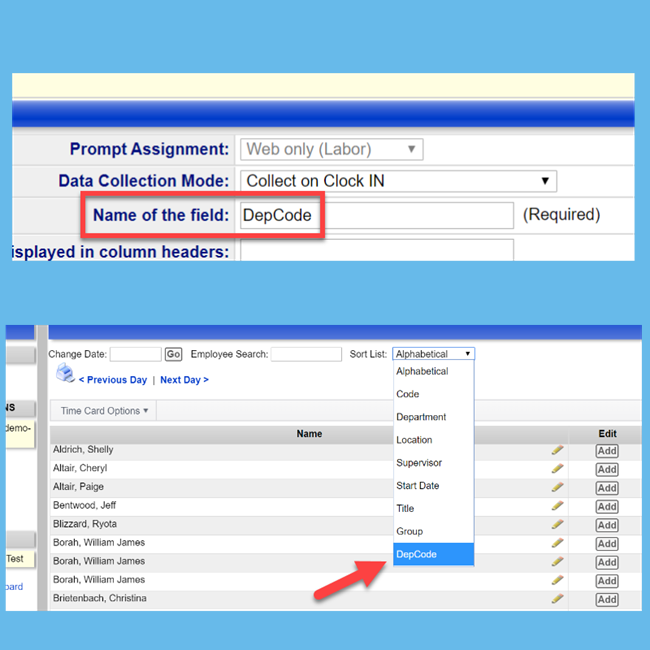
IMPORTANT: Do not use other system field names, like "Department", "Location", or "Category" to identify a clock prompt. Instead, use variations like "Dept", "Loc" and "Cat". Also, you should never change the field name after employees have started using the prompt.
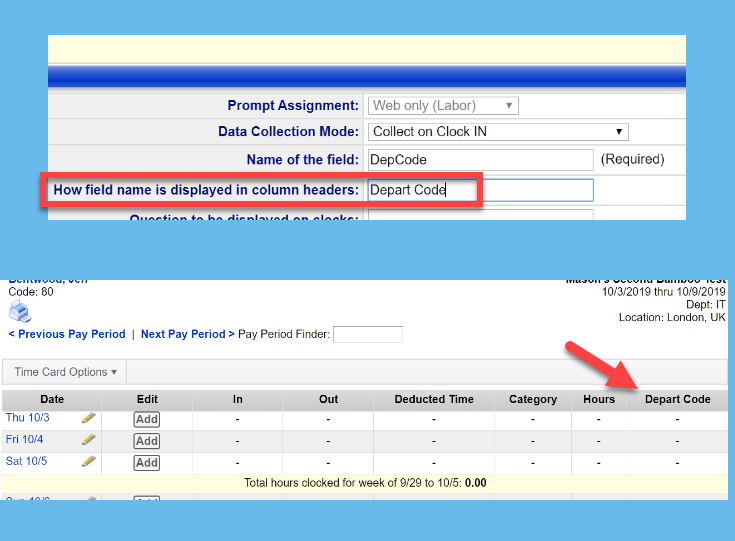
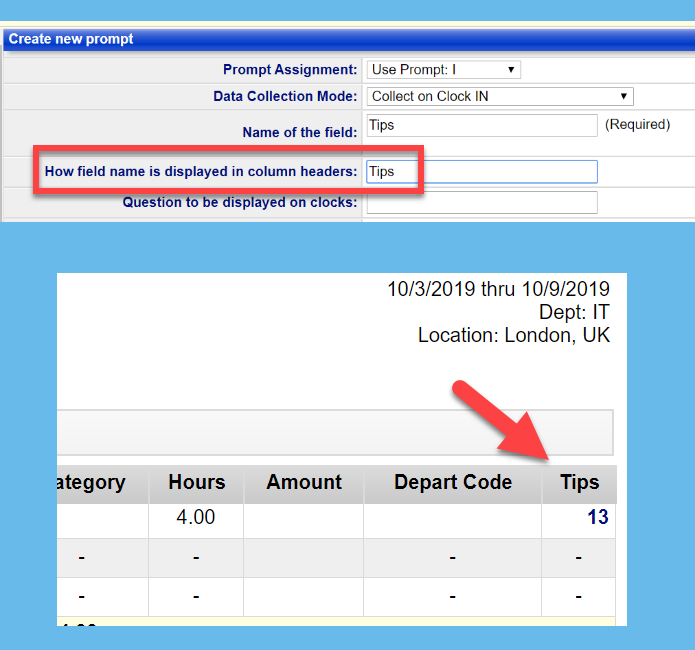
- How field name is displayed… creates a user-friendly column header on the time card. This label can have spaces, but it is limited to 17 characters.
- Question to be displayed… is what the employee will be asked. It is limited to 16 characters.
- Color Restriction (which only appears on lettered prompts) should be set to No restriction.
NOTE: More on Color Restriction can be found in the article Color Card Specific Clock Prompts. - Visible/Editable, in most cases, should be set to Visible/Editable. Selecting Visible/Editable means the prompt entries appear on the time card and any manager with edit permissions can modify the entry.
- WebClock Behavior, in most cases, should be set to Use default settings.
- What should happen if the employee doesn't enter anything… determines if the prompt is optional or not:
- Allow it means the employee's punch will be accepted without an entry. When using a physical clock, the employee would just press "OK" to skip past the prompt.
- Don't allow it… means the employee's punch will not be accepted without an entry.
- Employee's Home… means that if the employee doesn't enter a value, the system adds a value from one of the listed Employee Setup fields.
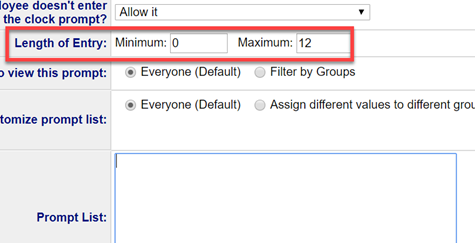
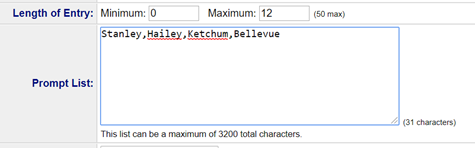
- Length of entry can be adjusted to restrict values based on character length. While this setting applies to all clocks, it's most useful in scenarios where an employee is directly entering a numerical value on a physical clock. That's because it decreases incorrect entries. It also restricts the length of values you enter in the Prompt List field.
- Groups to view this prompt and Customize prompt list relate to filtered prompts. Directions specific to filtered prompts can be found in the article Filtered Prompts.
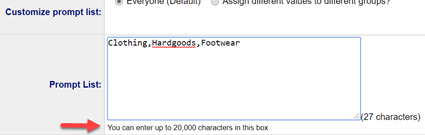
- Prompt List defines the values for the prompt. Separate each value with a comma, but spaces are not necessary between the commas. There is a character limit in this field that varies based on the type of clock you are using.
- Type of Entry defaults to Numeric Only. If you entered any alphanumeric values in the Prompt List, make sure you change it to Alphanumeric.
- Sort order allows you to determine where this prompt appears in relation to other prompts.
- Click Save when complete.
The labor prompt is now set up and instantly available on WebClock, mobile and Intelligent hardware clocks.
Before you can use the prompt on basic physical clocks, you or your client will need to press "9" on the clock to download the new prompt information.
Add a Numeric Prompt
Follow these steps if you are creating a numeric prompt for adding summed data, like tips or mileage. If you instead need a labor prompt for department or job code tracking, see the previous section titled Add a Labor Prompt.
To add a numeric prompt:
- Click Settings Menu ⇒ Client Configuration and choose the Clock Prompts tab.
- Click Add Prompt. The following steps detail each field on the setup window.
- Prompt Assignment depends on what kind of clock your client is using:
- For basic physical clocks, like the Z33 or GT-400, choose either I, J, or K.
- For WebClock, mobile or Intelligent hardware clocks, (Touch and Vision) choose Web only (Numeric).
NOTE: Technically, you could use I, J or K on these clocks, but because lettered prompts lack additional features, it is suggested you use "Web only" whenever possible.
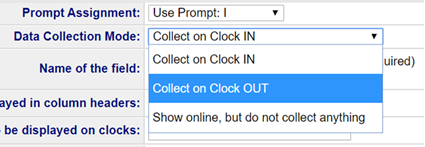
- Data Collection defines when the employee will see the prompt. In most cases, numeric prompts are collected when clocking out, so select Collect on Clock OUT.
- Name of the Field identifies the prompt in the system. Field names must:
- Be no more than 20 characters in length.
- Start with a letter.
- Not contain special characters or spaces.
IMPORTANT: Do not use other system field names, like "Department", "Location", or "Category" to identify a clock prompt. Instead, use variations like "Dept", "Loc" and "Cat". Also, you should never change the field name after a client has started using the prompt.
- How field name is displayed… creates a user-friendly column header on the time card. This label can have spaces, but it is limited to 17 characters.
- Question to be displayed… is what the employee will be asked. It is limited to 16 characters.
- Color Restriction (which only appears on lettered prompts) should be set to No restriction.
NOTE: More on Color Restriction can be found in the article Color Card Specific Clock Prompts.
- Visible/Editable, in most cases, should be set to Visible/Editable. Selecting Visible/Editable means the prompt entries appear on the time card and any manager with edit permissions can modify the entry.
- WebClock Behavior, in most cases, should be set to Use default settings.
- Groups to view this prompt relates to filtered prompts. Directions specific to filtered prompts can be found in the article Filtered Prompts.
- What type of numbers… has two options:
- Whole Numbers is often used for mileage and piecework.
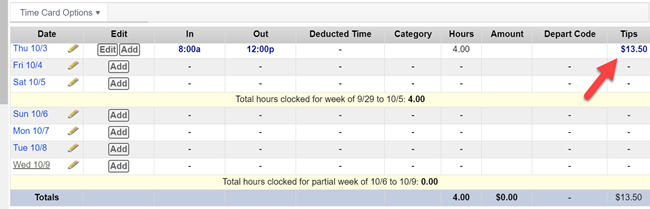
- Decimal point with hundredths is used for tips and dollar amounts. It will add a "$" to the entry which cannot be removed.
- Sort order allows you to determine where this prompt appears in relation to other prompts.
- Click Save when complete.
The numeric prompt is now set up and instantly ready to use on WebClock, mobile and Intelligent hardware clocks.
Before you can use the prompt on basic physical clocks, you or your client will need to press "9" on the clock to download the new prompt information.
Add a Location Stamp Prompt
Locations stamps are a type of labor prompt. Unlike prompts that ask the employee for a value, location stamp prompts collect data from the clock itself. They only work with physical clocks, including Intelligent hardware clocks like Touch and Vision.
The setup process has two parts: assigning a location to the clock and creating the prompt itself.
1 - Assign Location to a Clock
Clocks need to be added to the site before performing these steps.
- Click Settings Menu ⇒Clock Status to view a list of the site's clocks.
- Click the serial number of the clock.
- Click the Add/Change link next to the Location Stamp field.
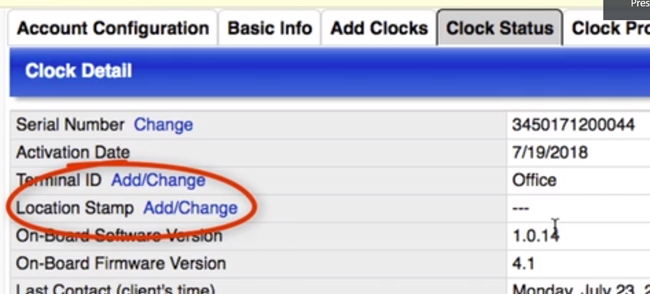
- Enter the location associated with that clock.
- Click Save.
Repeat these steps for any additional clocks the client may have.
2 - Create a Location Stamp Prompt
- Click Settings Menu ⇒ Client Configuration and choose the Clock Prompts tab.
- Click Add Prompt. The following steps detail each field on the setup window.
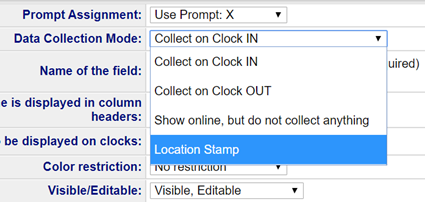
- Prompt Assignment must be either X, Y, or Z. You cannot add a location stamp to a Web Only Labor prompt.
- Data Collection is Location Stamp.
- Name of the Field identifies the prompt in the system. Field names must:
- Be no more than 20 characters in length.
- Start with a letter.
- Not contain special characters or spaces.
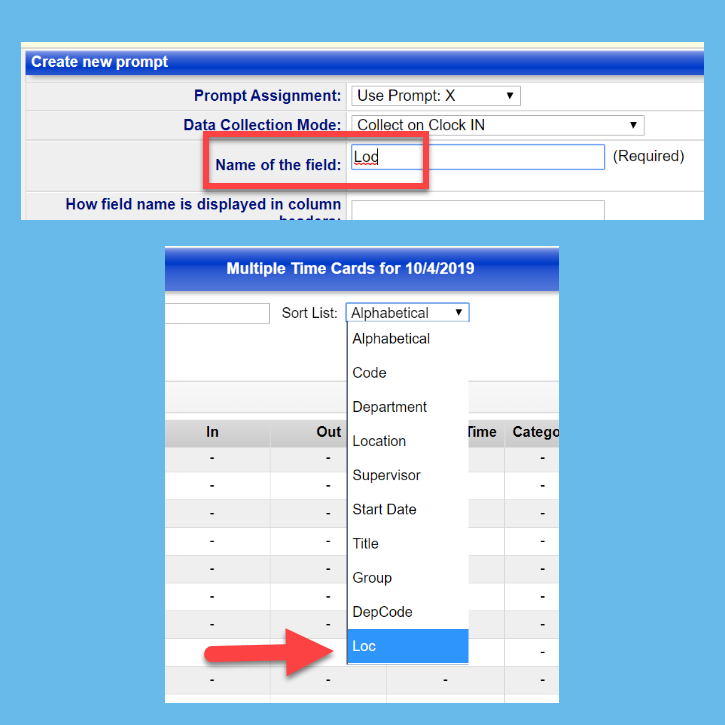
IMPORTANT: Do not use other system field names, like "Department", "Location", or "Category" to identify a clock prompt. Instead, use variations like "Dept", "Loc" and "Cat". Also, you should never change the field name after a client has started using the prompt.
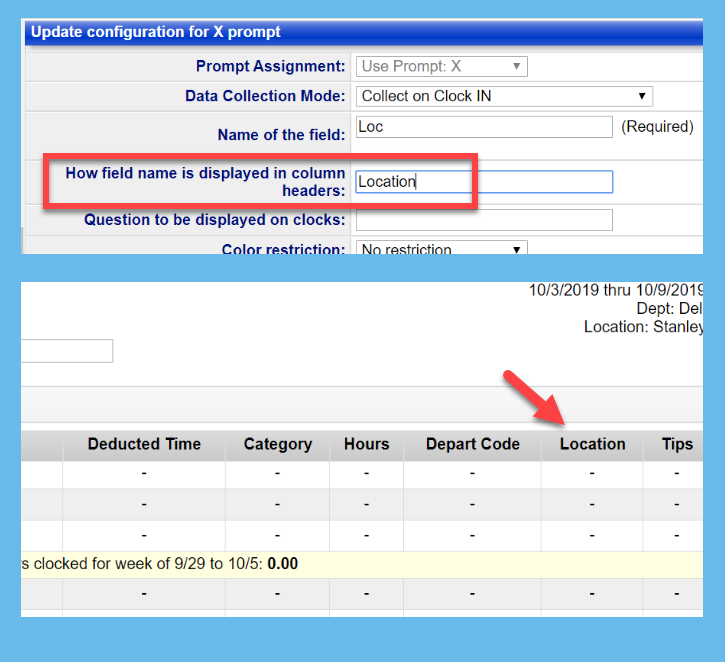
- How field name is displayed… creates a user-friendly column header on the time card. This label can have spaces, but it is limited to 17 characters.
- Question to be displayed on clocks is not necessary since the employee will not be prompted to enter anything.
- Color Restriction should be set to No restriction.
NOTE: More on this can be found in the article Color Card Specific Clock Prompts.
- Visible/Editable, in most cases, should be set to Visible/Editable. Selecting Visible/Editable means the prompt entries appear on the time card and any manager with edit permissions can modify the entry.
- WebClock Behavior can be set to Use default settings, but technically, a location stamp does not work with WebClock. There is no way to assign a location stamp to punches made on the WebClock or mobile app.
- What should happen if the employee doesn't enter anything…, in most cases, should be set to Allow it.
- Length of entry can be adjusted to restrict values based on character length. While this setting applies to all clocks, it's most useful in scenarios where an employee is directly entering a numerical value on a physical clock because it decreases incorrect entries. It also restricts the length of values you enter in the Prompt List field.
- Prompt List can be used to enter the values for the locations. Although the values are coming from the clock, entering the values here also allows managers to select locations from a dropdown when editing the time card. Separate each value with a comma. Spaces are not necessary between the commas. There is a character limit in this field that varies based on the type of clock you are using.
- Type of Entry defaults to Numeric Only. If you entered any alphanumeric entries in the previous step, make sure you change it to Alphanumeric.
- Sort order allows you to determine where this prompt appears in relation to other prompts.
- Click Save when complete.
The location stamp will be instantly available on Intelligent hardware clocks.
Before you can use the prompt on basic physical clocks, you or your client will need to press "9" on the clock to download the new prompt information.
Deleting Prompts/Renaming
Do not delete or change the field name of a clock prompt unless you are certain you do not need the data. A better option, at least into you are confident the client has the data they need, is to set the visibility settings of the prompt to "Not Visible/Not Editable".
Scripting can also be used to transfer and translate certain data from one prompt to another. Contact technical support for further assistance or see the article Changing Labor Codes / Clock Prompts with Scripting - TWP.
Filtered Prompts
Web Only clock prompts can be filtered to employee groups.
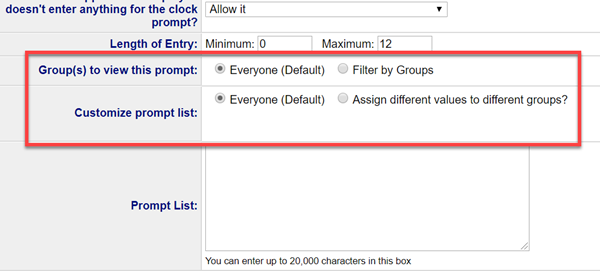
You can filter Web Only prompts so certain prompts are only visible to select employee groups.
You can also filter the prompt list so that certain groups see a customized list of values in the dropdown.
Filtered prompts cannot be setup on the lettered prompts (I, J, K, X, Y, Z) and therefore are not available on non-intelligent physical clocks.
Instructions for configuring filtered prompts can be found in the article Filtered Clock Prompts.
Additional Clock Prompt Settings
When creating clock prompts, there are some additional options which are not fully described in the instructions above.
Show online, but do not collect anything
This Data Collection Mode is used for prompts that should appear on the time card, but will not actually be answered by the employee when using the clock.
Online only prompts can be used by managers and supervisors when editing the time card.
They can also be used for scripting purposes.
Color Restriction
See the articles:
Visible/Editable Settings
If you want to prevent a user at any level from editing a prompt on the time card, you can use Visible/Not Editable. That can be useful if a prompt value is being set by a script.
Also, occasionally clock prompts can be used to hold values needed for scripting. Not Visible/Not Editable can be used to hide these prompts from the time card entirely. In this case, they serve more as a storage mechanism or counter as opposed collecting data associated with the punch.
WebClock Behavior
At one time, this option had multiple purposes. One was to create dropdowns for employees using WebClock, mobile or Intelligent hardware clocks. However, it is no longer necessary to do this. As long as there are values in the Prompt List field, WebClock, Intelligent hardware clocks, and our latest mobile app will present a dropdown to the employee. The one exception is our legacy mobile app.
This field also has an option to hide a prompt from the WebClock. This can be useful if the client uses a mix of both physical and WebClocks, and the prompt is not needed on the WebClock.
Character Limits
Depending on your clock, the prompt list box can contain a varying amount of characters.
The X, Y and Z prompts, which are the only prompts you can use on physical clocks, other than Intelligent hardware clocks, can hold a prompt lists of up to 3200 characters, including spaces and commas.
However, some older clocks have lower character limits. For instance, the Tranz380 and Hosted Voice Clock will only allow 230 characters. Also, the WebClock 1.0 only supports 230 characters.
Web Only prompts have a higher limit, up to 20,000 characters. This is a combined limit per web prompt and not per Prompt List.

